GUIDES FOR UTM STAFF TO UPLOAD PHOTOS TO UTM PHOTO GALLERY
How to Upload
On this page, you will learn step-by-step on how to upload photos from university events you have organised to the gallery.
Kindly follow the steps below to ensure that the standard and the guides of uploading photos to UTMlenses are observed.
UTMLenses v.2
UTMLenses was created and maintained by UTM Library & UTM Digital for the purpose of publishing photos from university events and photography materials for the university.
Step 1
If you have never log in to this gallery, please fill in the registration form to get your user id and password. Click on the button below to register.

Step 2 : Log In
Go to the login page at https://utmlenses.utm.my/wp-login and type-in your username and password.

Step 3 : Post
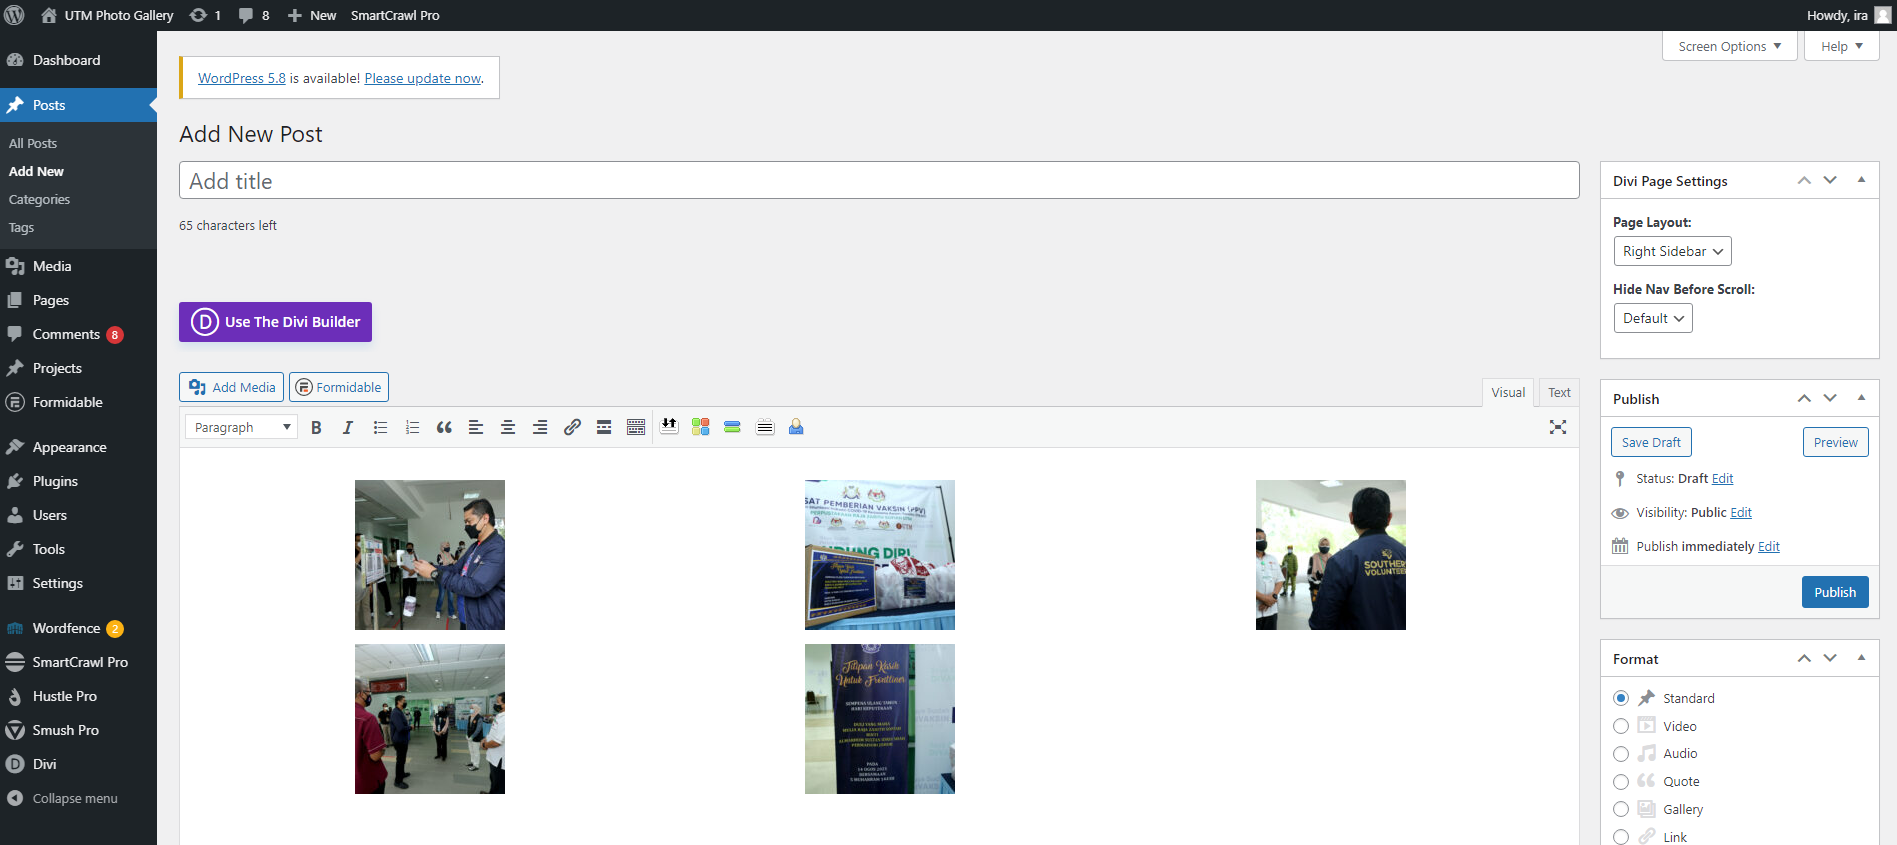
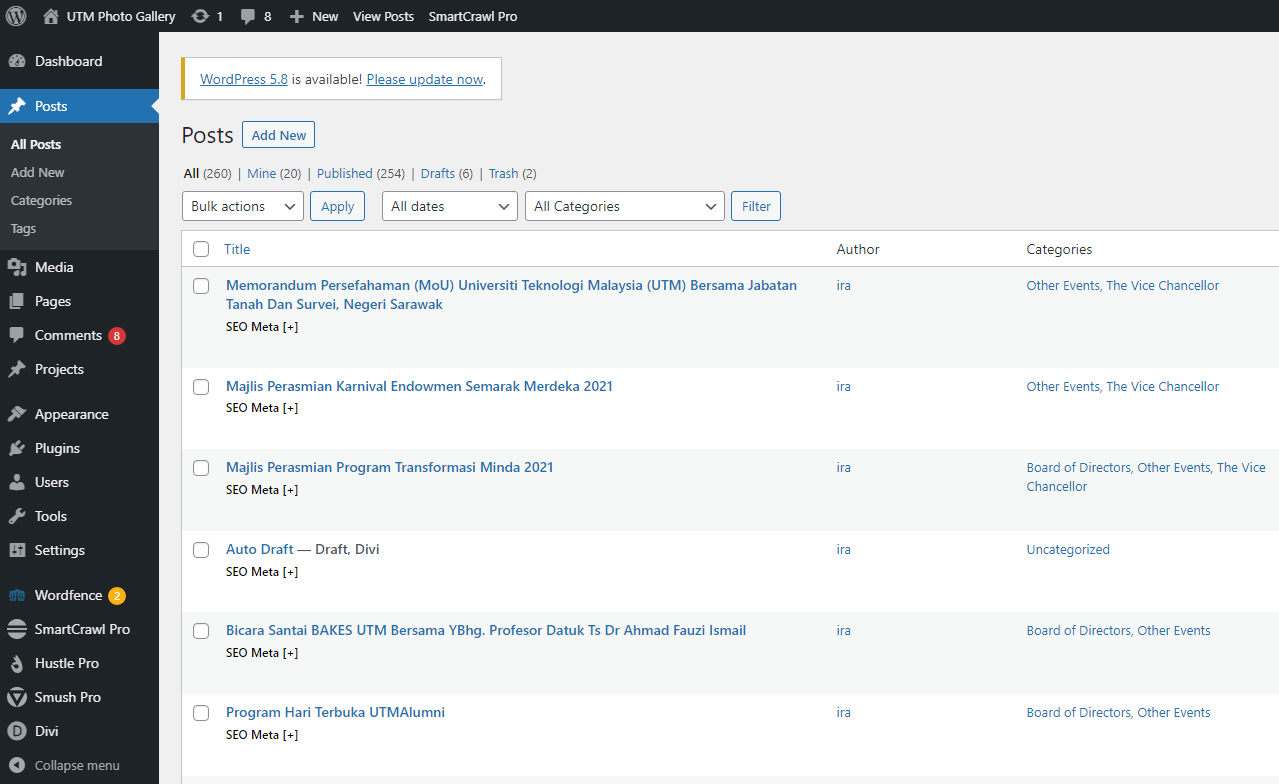
On the top left side of the dashboard, click posts and then click add new.
Step 4 : Add Media
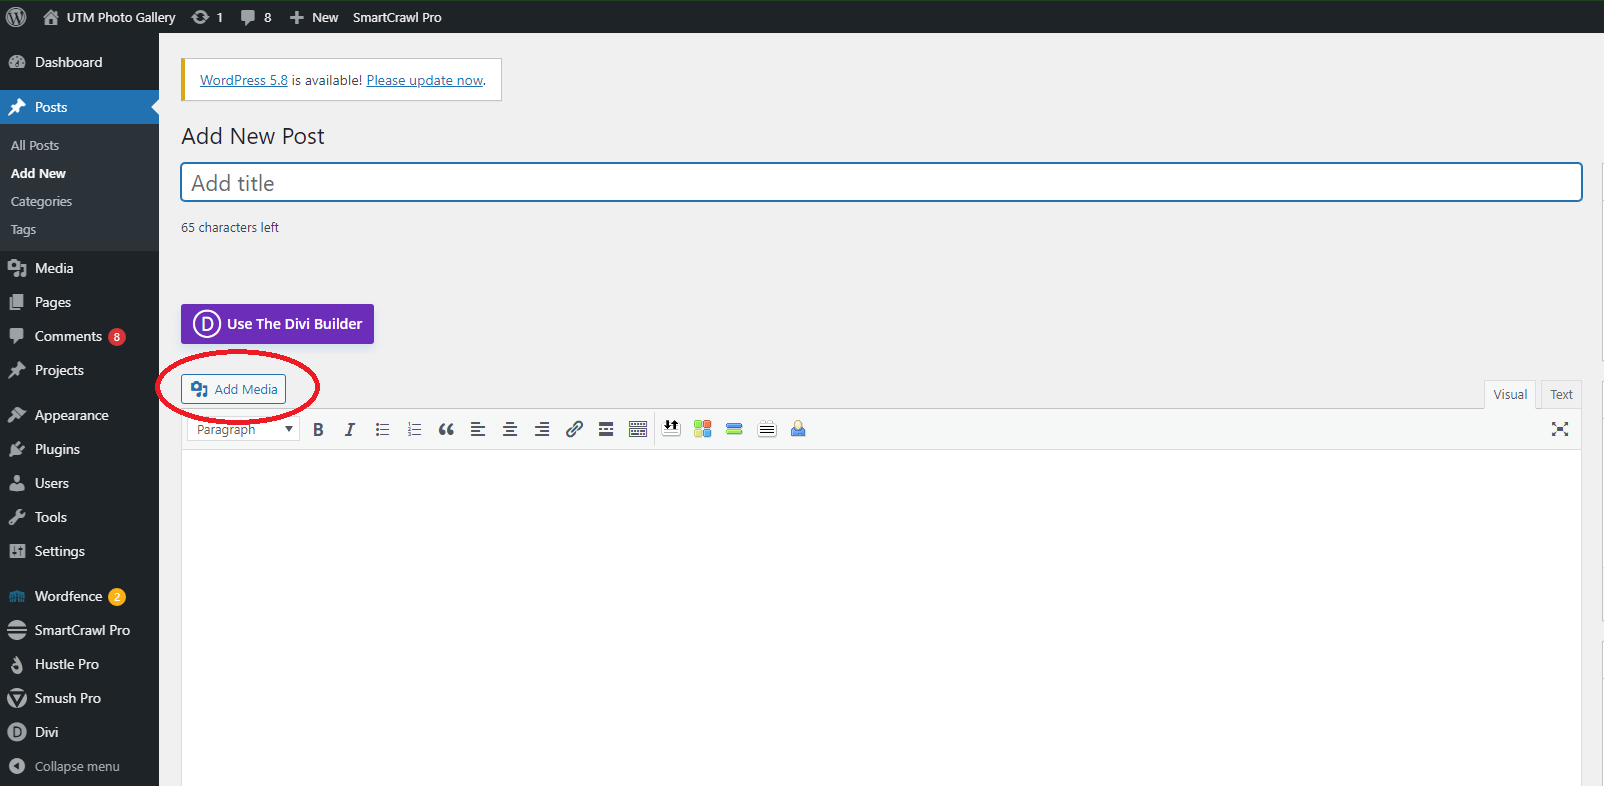
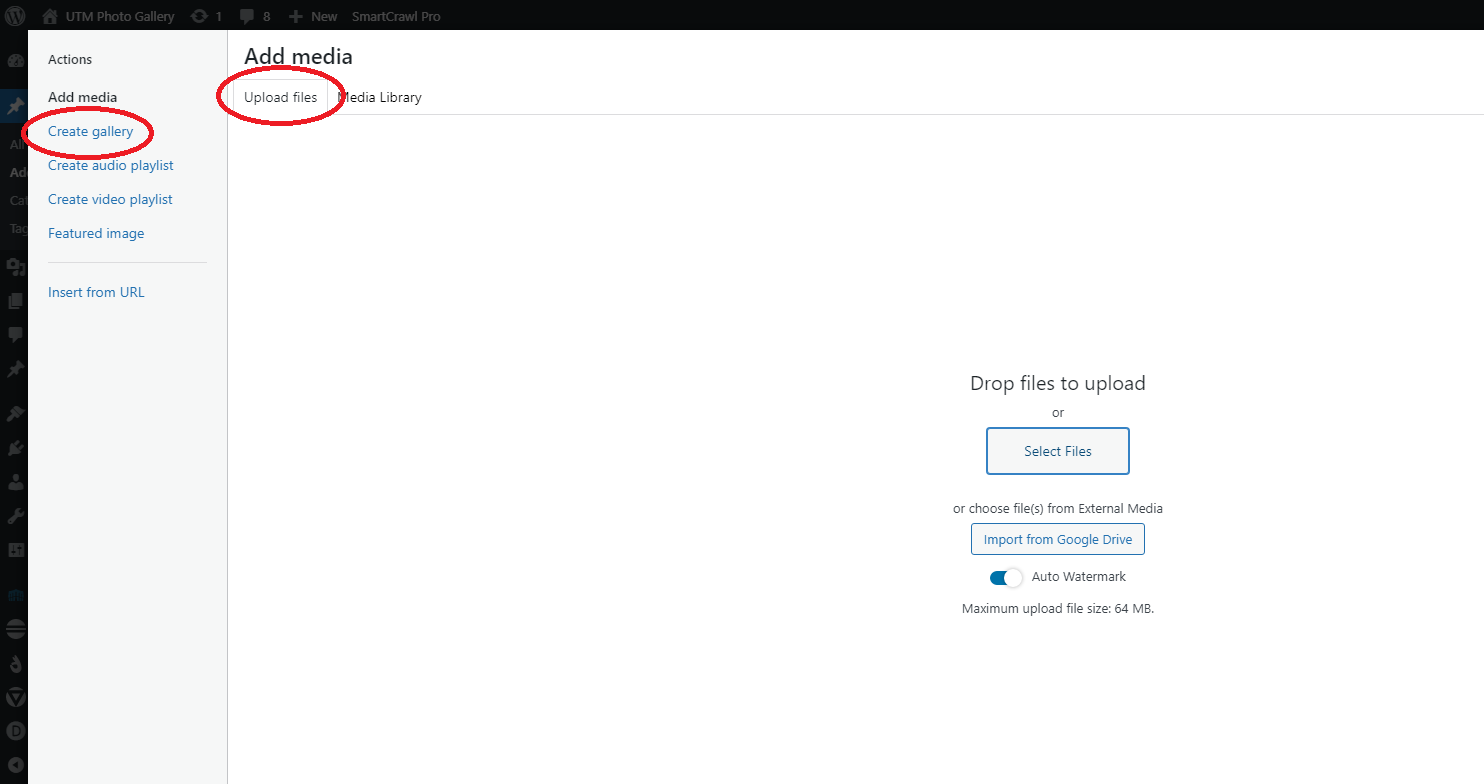
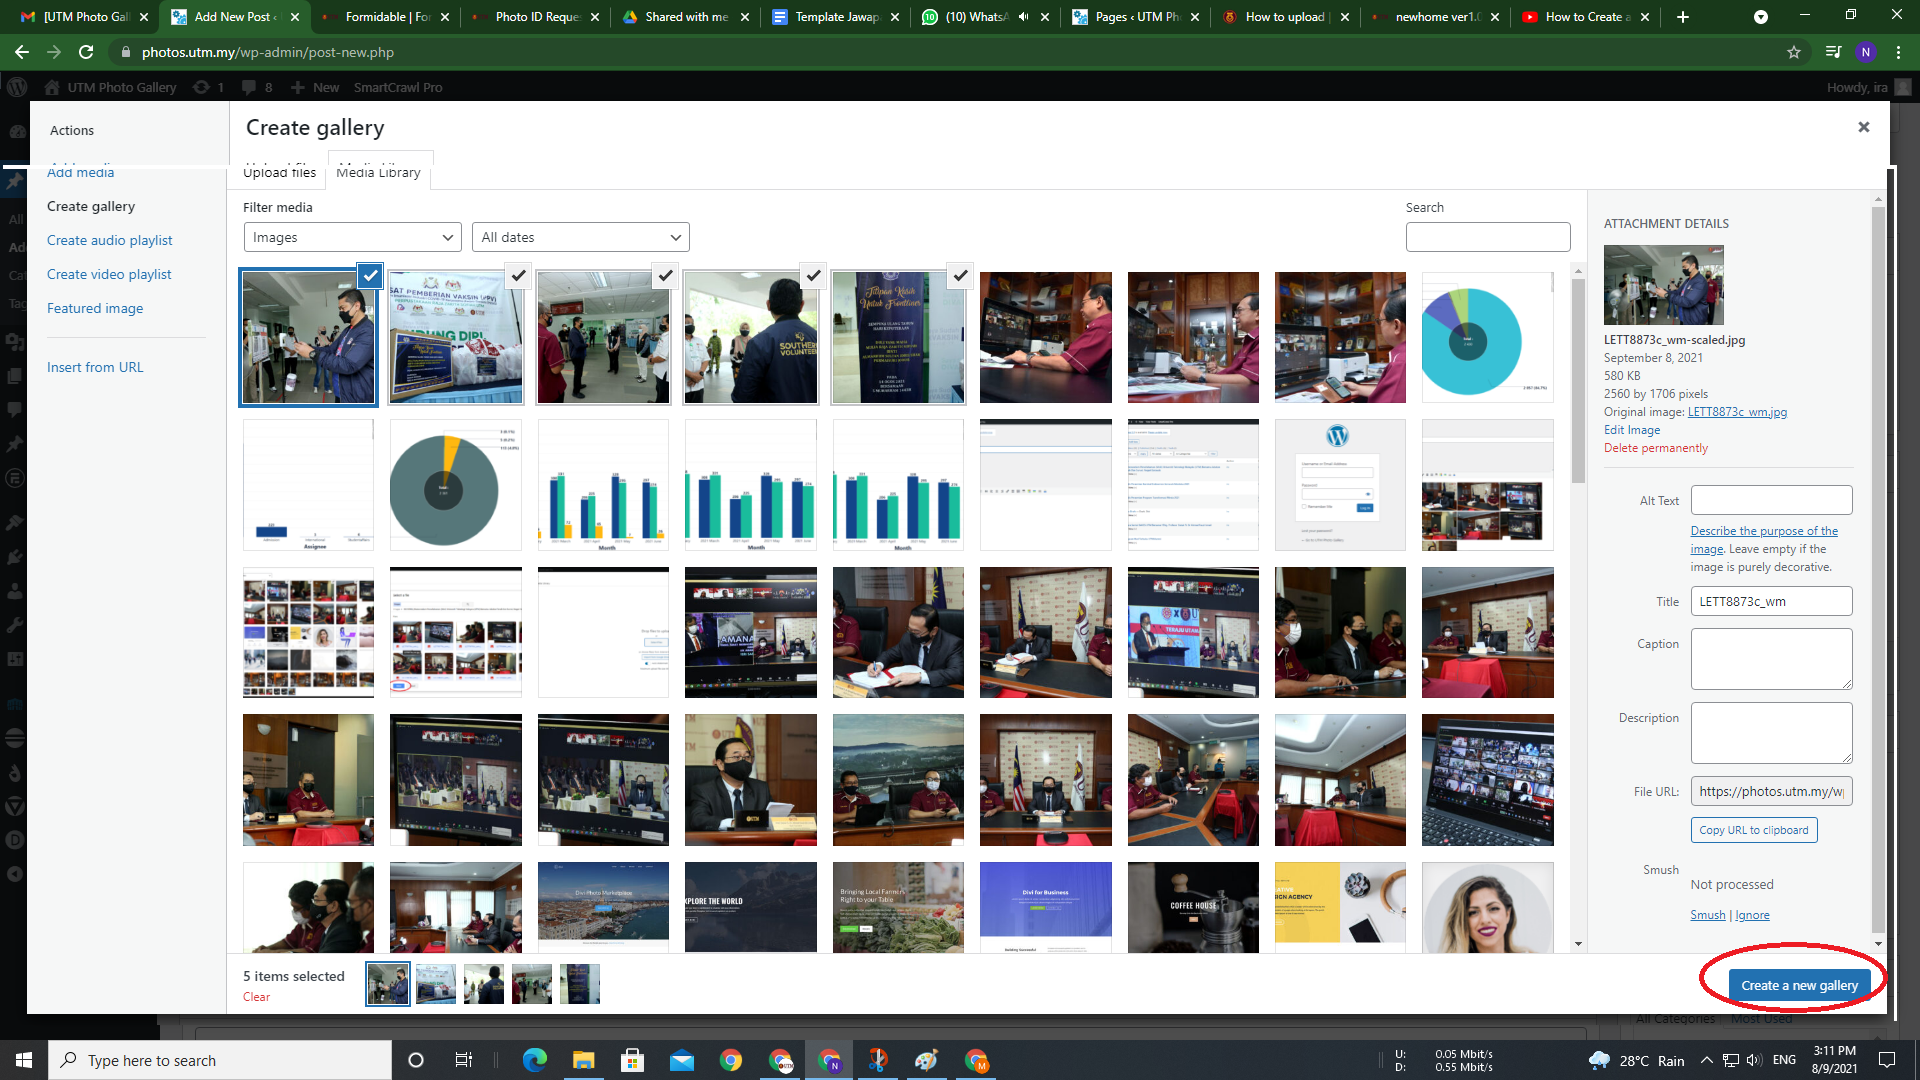
Click add media, then click create gallery and upload files.
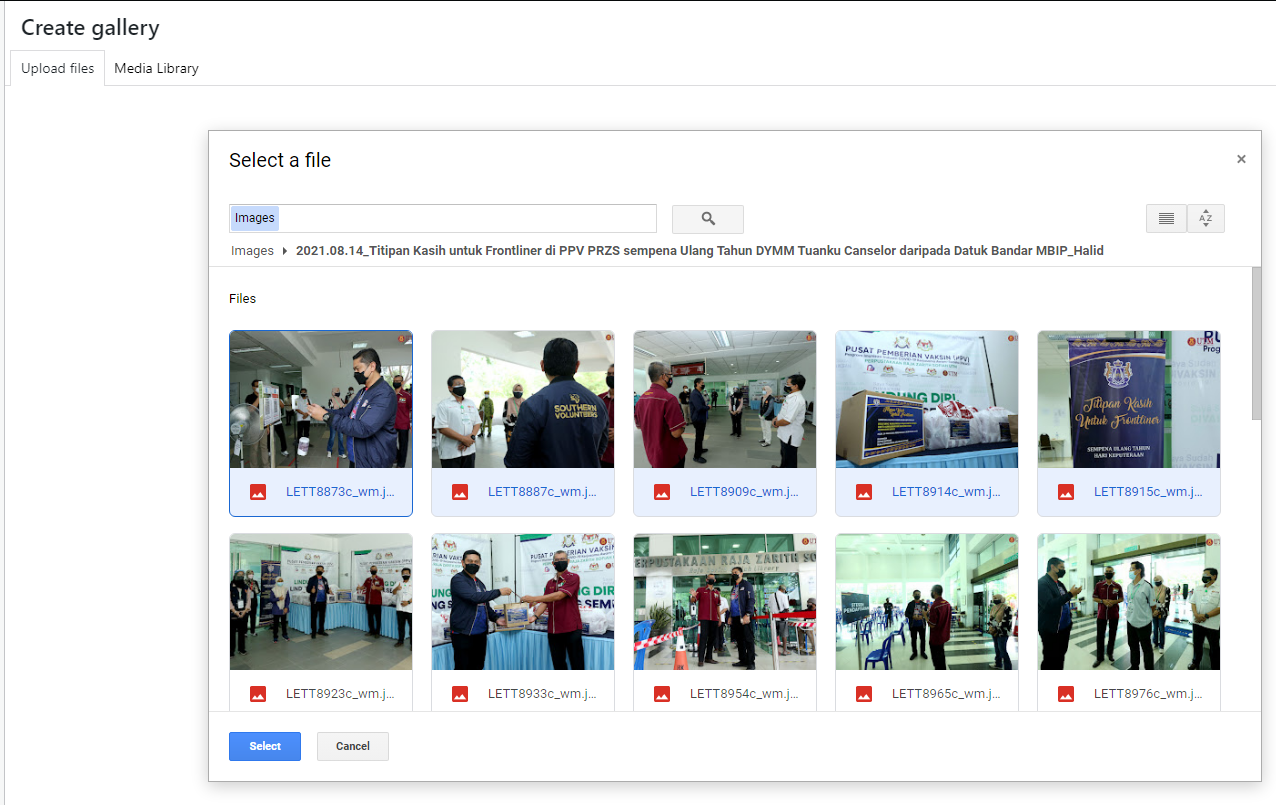
At the upload files window, you can choose either to select files from computer or import from google drives.
Step 5 : Upload Image
Choose the photos that you want to upload and click select.
Wait for a while until all photos are uploaded and click create a new gallery > insert gallery.
Please take note that a maximum of only 30 photos can be uploaded.
Step 6 : Publish
Insert photos title and on the right-hand side, choose the suitable categories, insert tags, and choose the best shot as the featured image.
You also can add some descriptions about the moment on the event at the top of the photos. The formula is 5W 1H (When, Where, Who, Whom, What & How).
Lastly, click the blue Publish button and you’re done!
Congratulations!
